Thursday, September 26, 2013

COMBER ROTARY ENGINE

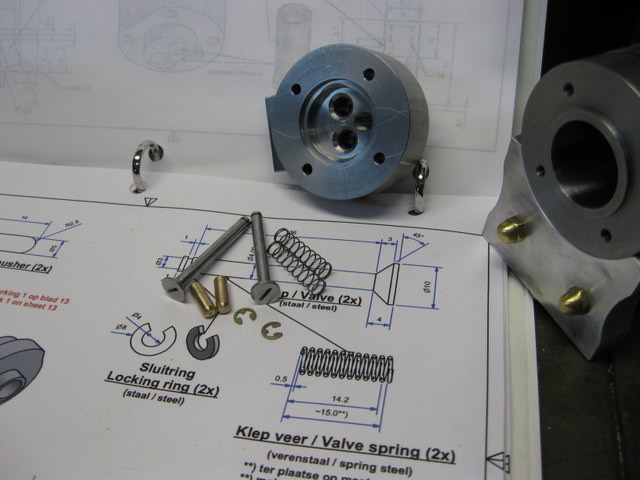
 After working on it since the first part of September, on the 16th I completed a model of a Comber rotary engine, using plans taken from the book "Elmer's Engines". Although it would spin free and easy when turned by hand, it refused to even try to run when air pressure was applied, even up to 120psi. Needless to say I was quite disappointed and did not know what to do about it. Good friend Mike Nay came to my rescue. He searched the HEME website and found other builders of the same engine had experienced problems and solved them with slight design changes. Those changes would have been so easy initially had I known about them, but a major rebuild now, but then what good is an engine that will not run.
  Shown in the above picture is the engine rebuilt with a 1/16" larger cylinder bore and 3/16" smaller rotary valve diameter. WOW, what a difference it made. The engine runs very well now on almost no air pressure at all. Take a look at the video below.


LITTLE WOODPECKER


Last week I was feeling kind of down and needed something to cheer myself up a bit, so I carved out a little woodpecker. It was quick and easy. He is a lively little fellow and it makes me smile to watch him. Take a look for yourself.


Friday, August 30, 2013

SCATTER GATHER


It was a time for another project of a whimsical nature, not good for anything except maybe amusement. After considerable thought a scatter gather machine was chosen. In a way it sort of reflects my own personality. It has gears and a crank, things that I really like, and besides that it is quite "eccentric".

     As is normal for scratch built ideas it required some pattern work, castings, and machining.


           Here is a video of it in action. It cycles every 4 turns of the crank.

Saturday, June 15, 2013

VAN DE GRAAFF generator

After completing the Wimshurst machine I decided to build a Van de Graaff static generator. I wanted to build one anyway.
First order of business was to gather some materials. A couple stainless steel bowls from K-Mart, a piece of PVC conduit from Lowe's, an old sewing machine motor, etc.
The construction was reasonably simple. It is simply a belt that runs on pulleys, one at the top and one at the bottom, and then there are brushes quite similar to the ones that I made for the Wimshurst machine at each end to pick off the static. The two bowls were fastened together to form a reasonably close approximation of a sphere which serves as a collector of electrons at the top.
Most instructions specify using a gum rubber belt, but one claimed vinyl coated polyester worked better so that is what I used. Shown here being super glued into an endless belt.
 Here it is finished setting on the work bench ready for testing. The wand with the door knob on the end is for discharging the static, but it turns out that using my hand is easier. Besides it really impresses people when I take a 3" or 4" spark without flinching.
And finally set up in the display room for demonstration. It will certainly generate static producing real long sparks, occasionally some nearly a foot. Interestingly they are almost painless when they strike your skin. One time I got zapped right on the end of the nose as I reached over to shut it off. I've had varying degrees of success getting it to make people's hair stand on end.
BUT it does a real job on a large Blond Barbie Doll head. She gets a real charge out of demonstrating it!


Thursday, April 4, 2013

WIMSHURST MACHINE

For quite some time I've had a hankering to build a static electricity generating machine, ether a Van de Graaff or a Wimshurst. The Wimshurst was picked because it is more mechanically interesting. Over time I had collected information, and there is tons of information on the internet, although I never did find a suitable plan. It looked like most builders did their own variation, so I decided to do the same.
As with most models I started by making patterns and pouring castings.
Followed by a little machining, which did not amount to too much on this one.
Then acrylic discs were cut out and aluminum sectors applied.
After that a Walnut board was milled out to mount everything on.
Large pill bottles were used to make the Leyden Jars by applying aluminum foil inside and out over the bottom half.
The combs or brushes were of my own design. A copper strand from a scrub pad was wound around a simple mandrel and a very thin layer of solder run along a 1/16" brass wire.
This was then slid into a keyhole shaped slot in a 3/16" brass rod.
After being at it for a month it is finally completed. Here is a view from the back side, there is a front view at the beginning of the post.
There is nothing like a Video to show that it works, so take a look.


Friday, February 22, 2013

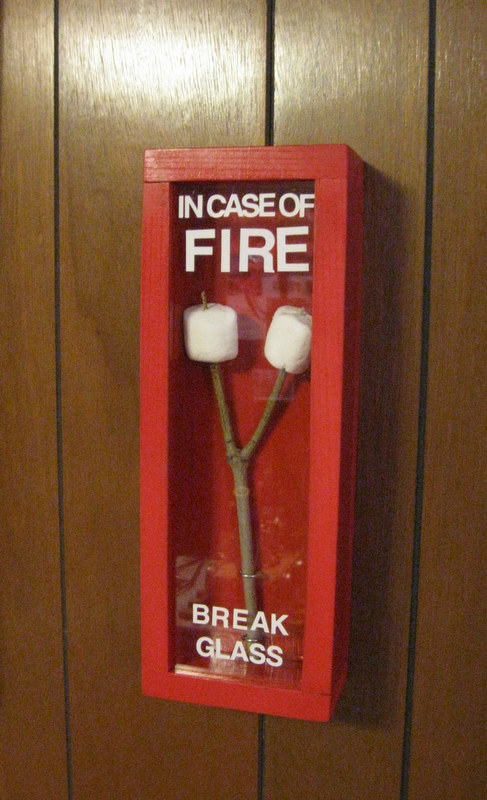
FIRE CODE

Due to chances of fires in the neighborhood, we have up graded and are now in full compliance to the new fire code.

Sunday, January 20, 2013

BUZZ COIL SPARKER

During one of the first couple days in January I went to Cutler Cycle and Mower and bought a new snow blower to replace the one that has that been in use for the past 27 years. It still worked OK, but I wanted to treat myself to something new.
While I was there, I was able to acquire some magneto coils from lawn mower type engines. They can be converted to make ignitions systems for model gas engines, and even full size ones for that matter.
 The first step is to check it out to make sure it is good. It was.
Then a small wooden box is constructed and everything stuffed inside. Also a set of buzz points and some terminal screws.
After all that, it is time for testing so an old battery that has been sitting around for ages was pulled out. The meter indicated 6 Volts, but it only produced a puny weak spark and then quit altogether. How disappointing.This is the 4th system I've built so I knew it should do better than that. A trip to the hardware store for a new battery proved it. Look at the video.
These little buzz coils are a facsimile of the buzz coils used in Model T Ford cars and Fordson tractors. They produce an almost continuous arc rather than a snap spark supposedly providing more positive ignition.
 If desired these coils can be hooked up to provide a single snap spark too. The model Atkinson in the previous posting is wired that way.


Tuesday, January 1, 2013

ATKINSON CYCLE ENGINE

Somewhere around August or September while browsing the HEME website, I happened to see a picture of Jan Ridders version of an Atkinson Cycle engine that intrigued me. Although it uses the Atkinson Cycle, it is not a scale model such an engine. This one has a timing belt driven overhead cam shaft. Not vintage at all, but still interesting. I happened to mention seeing the picture to correspondent friend Reg Ingold of Australia, and would you believe by return email he sent a PDF of the plans for the model. I happened to be out of a project at that time and thought what the heck, it is as good a candidate as any, so I started gathering materials.
Just happened that materials to build it were already on hand, so it was a matter of cutting them out and start making chips. Progress was slowed by the fall cleanup (leaves etc.) and care taking responsibilities, but never less it proceeded at a rate about as fast as a snail tied to a stump, and parts slowly started to emerge.
                        Here are just a few of them.
The ignition is powered by flashlight batteries using a coil from the magneto of a Lawn mower type engine. The breaker points, not shown, are a Micro switch operated by a cam on the crank shaft. The spark plug is also home made. It is a spare left over when I built the 4 cylinder Panther Pup engine.
This engine is equipped with a Vapor Carburetor, where the intake air is drawn through the fuel tank, where it picks up vapors to run the engine. While this concept dates back to some of the very first gas engines ever built, it is new to me. I'm not sure how good it works. At the time of this posting I have not yet had the engine running, so I'll have to do a bit more fine tuning, but I feel confident that it will work. Videos of them show them working very well.
      During construction I took a short video while turning the engine by hand. It can be seen much easier how the mechanism works turning at that speed than running anyway.


Monday, December 31, 2012

MINI MILLING MACHINE

For quite a while I have had a desire for a mini milling machine. Not so much that I really needed it, but more that I just wanted it to mate with my mini lathe, and because several of my machinist friends had one. These are marketed by a number of vendors and are all basically the same with only minor differences. I selected a Micro Mark because it is white and clean looking. It arrived in late September and the first order of business was unpack it from it's two cardboard shipping cartons and clean the gooey anti rust preservative off. Then mount it next to the mini lathe on a portable workstation,
As with a machine of almost any kind it needed tooling and accessories to make it useful.
I started by making a combo wrench-hammer for the draw bolt, and putting a crank handle on the micro down feed knob.
Then I acquired a holder and set of ER collets. Also made some "T" nuts, and hold down clamps, and a couple special wrenches.
The setup coincided with the starting of an Atkinson Cycle model Gas engine and a number of the machining operations were preformed on the mini mill. Shown here it is shaping the saddles for the cylinder using a fly cutter. The metal is aluminum, but it walked right through it with beautiful smooth cuts.
                                                    
                And here it is slotting a screw head with a tiny fly cutter.

It is fun to use this little mill, and also the lathe, Like using toys that really work. I'm impressed. Within their capacity they both do a fine job. It is also nice to have a second machine available if one of my larger machines is set up for some special operation. I find that I use them much more than I anticipated I would.


Monday, September 3, 2012

TWO PUMPS

About 20 or more years I had an inspiration to build a model water well pump, and I went so far as to pour two castings. One in aluminum and one in bronze. Then I became distracted by other things and like myself the castings have been aging. So long in fact that the bronze developed a patina. A couple weeks ago I decided I better finish the job before I loose the opportunity.
It was decided to make one with a motor driven geared pump jack, and the other with a hand operated pump handle. Both types were common, and it usually depended on how affluent the owner was whether it had the motor operated pump jack, and if it did have the gear driven jack it was usually powered by a gasoline engine rather than an electric motor, but for my demonstration purposes an electric motor is much more convenient so that is what I used. Actually a small motor salvaged out of a defunct computer printer.
The aluminum casting was painted, and the bronze left natural. The advantage of a hand powered pump is that you can still get water in case of a power failure. And if only a small amount of water was needed it was easier to pump it, than fuss with starting cranky old engine.
    Both pumps work well as can be seen in the video below.
There you have it. A couple more models to put on display for "show and tell", my favorite activity.


Thursday, August 2, 2012

MINI WEED

Another model project was completed yesterday, August 1st 2012.
Inspiration to build it came from my little friend Max Francis. Last Christmas Max's grandpa Larry gave Max his childhood toy Weeden Steam engine. Out of his many grand kids, Larry said that Max was the "one" who would appreciate and take care of it. These are now real collector items and even I would like to have one. However the best option for me is just build it myself. Working from images of Max's engine, emailed me by his father Guy, I constructed about a 2/3rds size replica.
    Shown below are a couple images showing the new model next to the old original Weeden engine.
And shown below is a video of it running on compressed air. Although it is capable of being steamed, it is much quicker, easier and cleaner running them on air.
                                         Hope you enjoyed looking at it.


Max got his Weeden up to steam next to Birk's Mini Weed. They look great together.

Friday, July 13, 2012

EGG TIMER for the person who has everything


 Ten years ago there was a construction article authored by John Wilding published in the English Horological Journal on building a six minute weight driven pendulum operated egg timer. Knowing that I liked such things fellow hobby machinist, Pete Larsen shared the article with me, however it just sat dormant until a couple weeks ago. It was a fairly simple project and a pleasure to build. It is equipped with an unusual MacDowell single pin escapement that is interesting to watch. It is self starting and with pendulum bobs both above and below the pivot it acts somewhat like a balance wheel. It is easy running and requires only small weights, but they fall fast. About 40 inches in six minutes. A suitable bell could not be readily located So one was spun out of 1/16" sheet brass. That turned out to be a day long project in its self.
Now that it is finished I'm not sure how to use it. Do they have Egg Races?

Timing eggs or not, it is interesting to watch. Take a look.


Wednesday, June 20, 2012

Robinson Type Hot Air Model

Another model has just been completed and is ready to add to the display. This one is a model of a Robinson type hot air engine. It is not an exact scale model of any particular prototype, but a very close approximation.

Building it as I did, it was possible to pick and choose from various materials on hand. Construction was sort of hybrid because some parts were fabricated, machined from solid material, and some were castings.
I wanted to put lettering on the main casting, but raised letters on the side of a pattern will not lift out of the sand, so I used a method used by bell founders. The lettering was attached to a stick and after the pattern was lifted out of the mold, the stick was put down inside and gently pressed into the sand.
The results were not perfect, but satisfactory, as can be seen by the rough castings.
A couple more in process pictures. The hot cylinder was made from the end of a one pound propane tank. The displacer from a tin can. The stove was fabricated from sheet metal. There was a limited amount of head room for the burner, so I made a alcohol fired penny burner that works just beautiful as you can see in the video. The penny burner is a light weight backpacking stove for campers built out of the bottoms of a couple aluminum cans. Instructions for building one can be found on the internet
     It is an excellent running engine. I knew it would be even before firing it up, because it turned so free and easy, and yet had a little bounce from compression. Here is a short video, take a look for yourself.